
Make your workflow like a happily-raging river…
Never drop the ball again. Map out your steps in a snap, automate the boring stuff, and assign tasks so everyone’s on the page and super-productive. And changing workflows is a cinch, so your processes can evolve as quickly as your business.
Workflows can come in handy if you wish to get things done automatically in Tigersheet. Tigersheet workflows can help you automate your business processes, making them both more consistent and more efficient.
Let’s start by creating a workflow for something simple like an employee expense claim approval process.
- An employee submits a claim request for approval. The claim initial status is set to ‘Approval Pending’
- The Approver (concerned authority for e.g. HR manager etc.) receives a notification (email) that a claim request has been submitted and is seeking approval. The approver reviews the claim request and verifies if the approval conditions are met.
- If the request is approved by the user, an email notification is sent to the account manager in the accounts department with all the relevant details
- If the request is Rejected, then the approver is asked to specify the reason for rejection (Request a comment action is set).
- Once the request has been approved and payment is released, the accounts manager is asked to specify the mode of payment used.
(Note: Please refer to the video above that demonstrates the above process step by step)
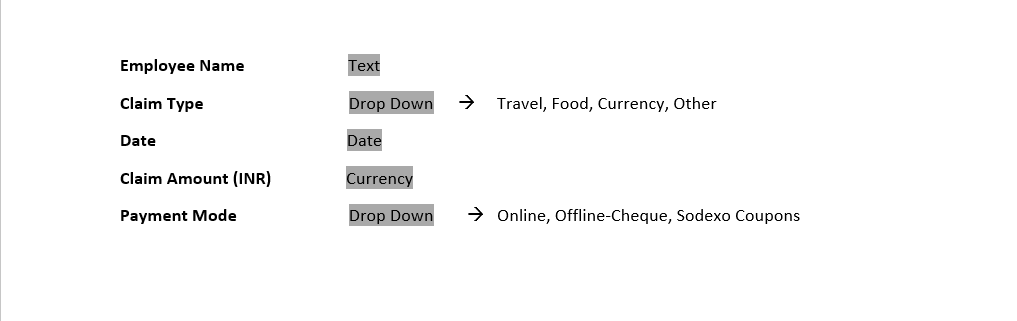
Create these columns in your Employee Expense Management Sheet (EEM).
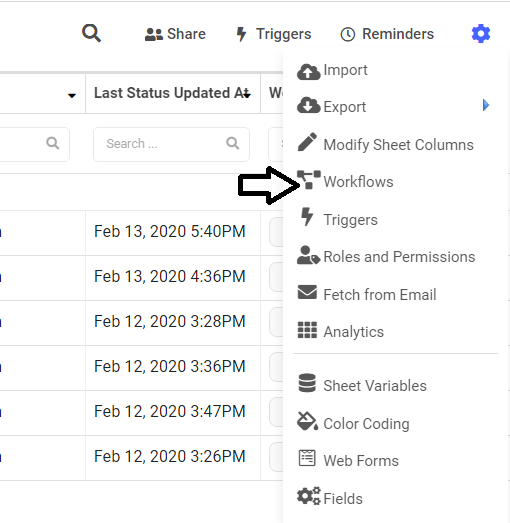
To begin creating a workflow click on settings icon present on top right and navigate to ‘workflows’.
Defining Workflow Status
A workflow status represents the current state of a record.
In case of an employee expense management, when an employee submits a new expense claim request. There can be 4 possible ‘status’ conditions which are:
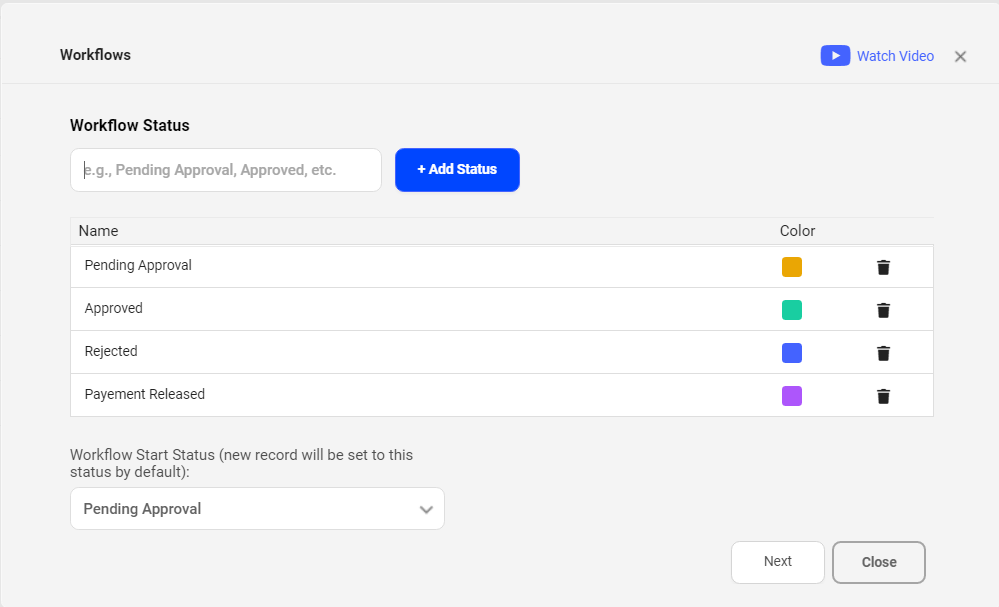
Approval Pending: The claim request is yet to be approved
Approved: The Claim request has been accepted by the accounts department or concerned authority.
Rejected: The Claim request has been rejected.
Payment Released: Once the claim request has been approved, Payment gets released
Workflow Start Status: This is the default status of the record assigned to it upon creation. For e.g.: As soon as an employee submits a claim request, its workflow status shall be assigned as ‘Approval Pending’
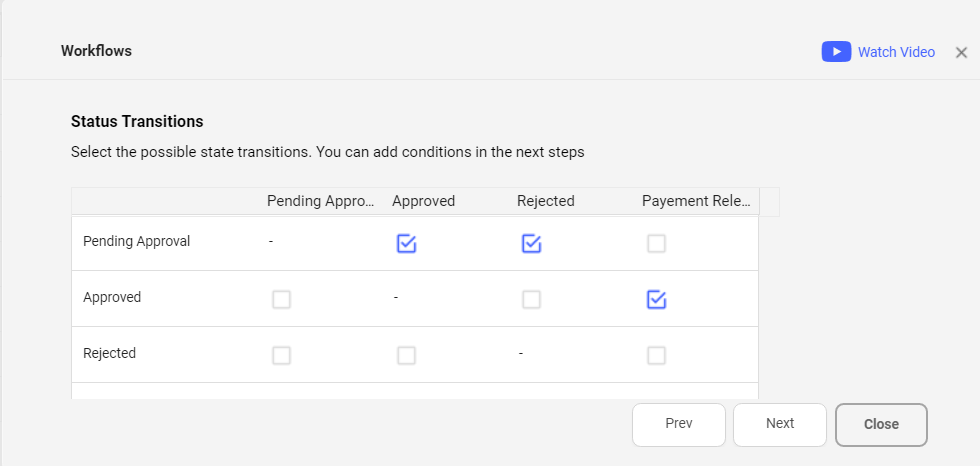
Defining Workflow Transitions
Once the workflow status has been configured, the next step is to define Possible State Transitions.
Workflow state transitions are used for moving from one workflow state to another. The transitions can be initiated manually by users or triggered automatically by the system.
Configuring Workflow Transitions:
Once the possible state transitions have been defined, the next step is to configure each of these transitions for different parameters. These include:
Permissions: You can define the roles, users, or specific column users who can make this transition. These three permission options include:
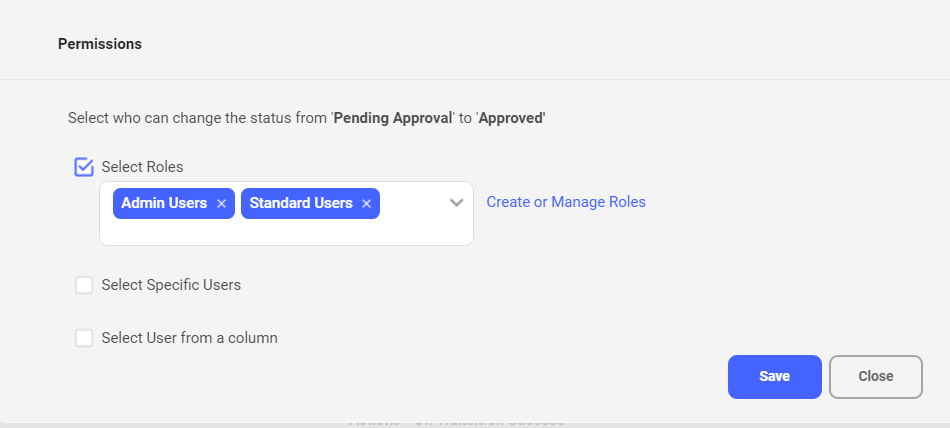
Select Roles: Each user belongs to a role and each role has specific permission associated with it. Tigersheet provides two predefined roles for users- Admin and Standard. Besides these, the admin can add more roles such as ‘Sales Staff’, ‘Marketing Staff’, ‘Content Team’ etc.
Select Users from a Column: If there are some specific users in a particular column you wish to grant permission to be able to make the transition, It can be done by using this option.
For e.g.: Transition: Pending Approval to Approved
Allow/Disallow Transition
You can allow or disallow a transition based on certain conditions. For E.g.:
According to company policies, all food expenses greater than 1000 shall not be accepted. So, if I want to disallow such claim requests automatically, I will add the following condition to the transition Approval Pending-🡪Approved:
EmployeeExpenses.claimType =’Food’
AND
EmployeeExpenses.claimAmount>=’1000’

Note: Here Claim Type is a drop-down column that specifies the type of claim such as Food, Travel, Other, and Claim Amount is a currency column (INR) that specifies the amount to be reimbursed.
Auto Transitions
You can set auto transitions to automatically initiate a state transition when certain conditions are fulfilled. For example, you can trigger an auto transition for a request to state ‘Approved’ or ‘Rejected’ if a certain number of days effective through have passed.
Adding Actions/Triggers to Workflow Transitions
Tigersheet is designed to enable you to skip over redundant workflows and leave them to the system to finish. That is why it has trigger-based workflows. These automatically complete tasks whenever an event is caused to occur. This is a very powerful feature that lets you make the most of workflows.
For example: As soon as a claim request is ‘approved’ by the concerned authority, the admin should be notified about it with an email.
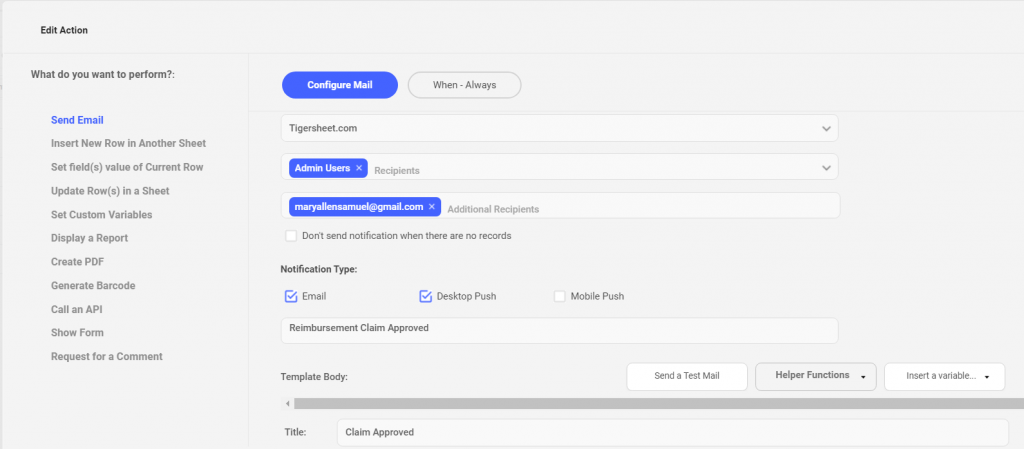
-Navigate to Actions- On Transition Success
-Click on ‘Add Action’
-Choose ‘Send Email’, under the list of actions available on the left-hand side.
-Fill in the email template entries such as To, (Recipient) Subject, Body with the appropriate information, and once done Click ‘Save’.